Replacing Google Analytics with GoatCounter
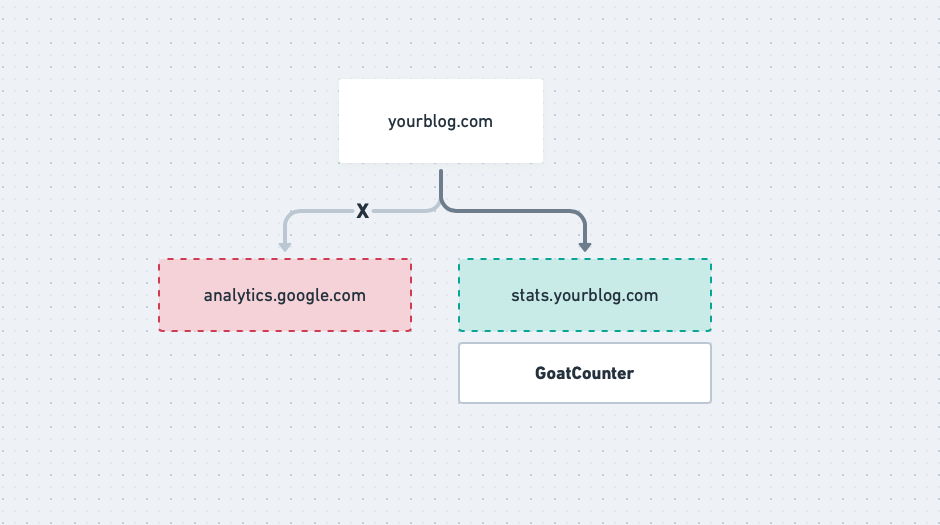
I recently set up the Pi-hole project at my home network with the intent of blocking requests to tracking and ads sites and services. Few days after activating Pi-hole, I noticed that I couldn’t access my blog’s statistics at Google Analytics. I was blocking requests made by my own blog. That’s when I decided to search for alternatives.
GoatCounter
While searching for a friendly replacement that focus on privacy for the blog readers, I found an article from Martin Tournoij about GoatCounter and the reasons that made him create the project.
GoatCounter is an open source analytics tool for the web. These are the main features that made me chose it for my blog:
- Privacy - It doesn’t collect personally identifiable information. According to the author, GDPR consent notices shouldn’t be required - details.
- Lightweight and Fast - The single JavaScript required adds just ~2.5KB.
- Simple and efficient UI.
- Open source!
- And much more.
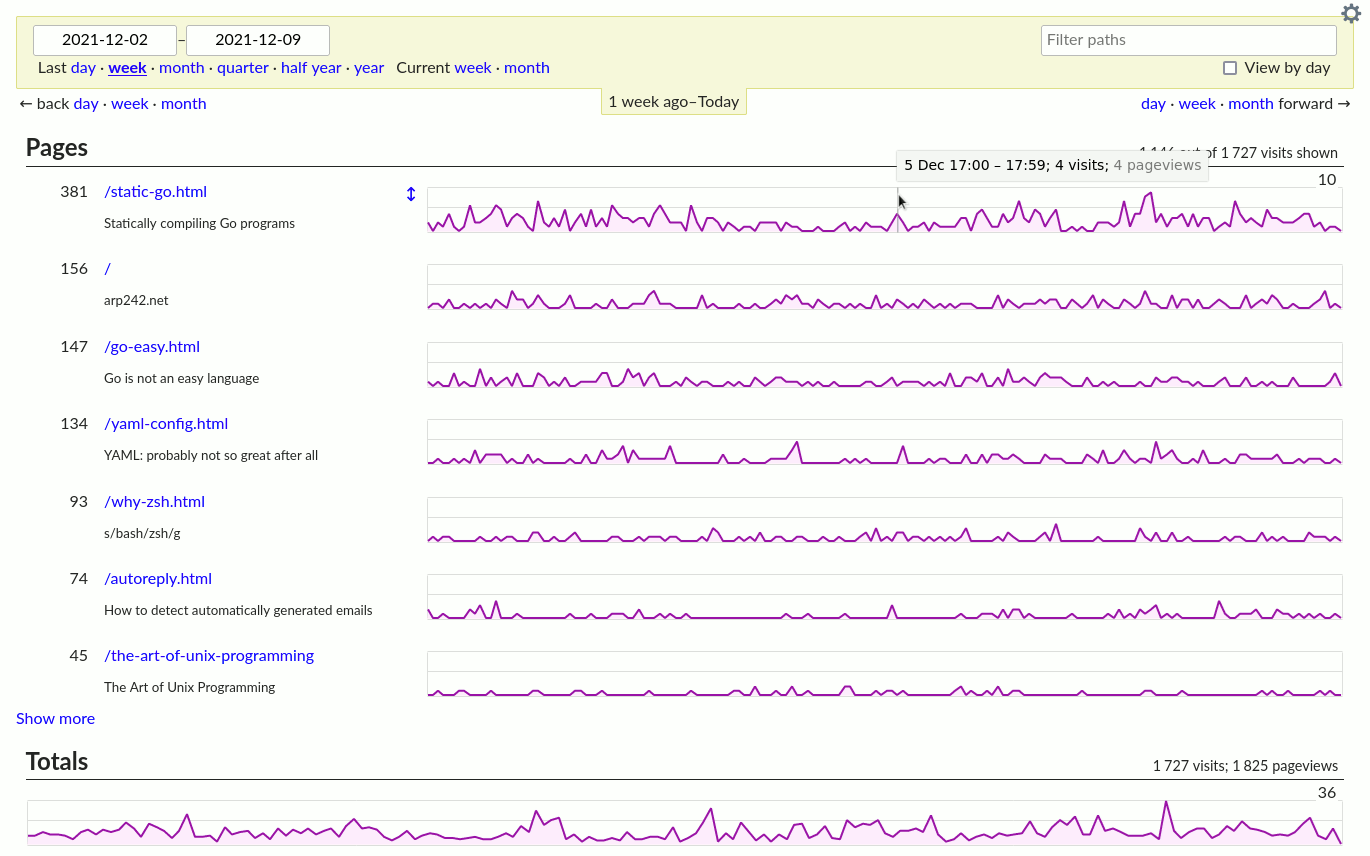
You can check out the GoatCounter interface accessing https://stats.arp242.net.
Before starting
Apart from an open source project, GoatCounter is also offered as a service, they even have a free plan for certain amount of monthly page views. But for this tutorial, I’ll be talking about how to host your own GoatCounter instance.
There are two requirements needed that I won’t cover in the tutorial. GoatCounter needs to be installed on a computer accessible via the internet, so the first requirement is that you have a virtual machine at some hosting provider, such as DigitalOcean or AWS. I’ll be using Ubuntu but any other Linux distribution should be fine.
The second is that you have a subdomain pointing to that virtual machine. During the tutorial, I will use the domain stats.yourblog.com.
Installing GoatCounter
GoatCounter was created using the Go programming language which, being a compiled language, facilitates the distribution of its programs. With GoatCounter it’s no different, we can download the binary at the releases page and simply run it. In this tutorial, we will use the version 1.4.1, the last version released before this post was written.
# Download GoatCounter binary from Github
$ curl -L https://github.com/zgoat/goatcounter/releases/download/v1.4.1/goatcounter-v1.4.1-linux-amd64.gz -o goatcounter.gz

# It comes in a compress files so we need to extract it
$ gunzip goatcounter.gz

# By default, the file doesn't come with execution permission
# and we can change that using chmod
$ chmod +x goatcounter

# Now, to make the command available in the whole system, we just need to
# move it the /usr/local/bin/ folder
$ sudo mv goatcounter /usr/local/bin/goatcounter

# Execute GoatCounter using the version subcommand to confirm that the instalation
# was done successfully
$ goatcounter version
version=v1.4.1; go=go1.15.1; GOOS=linux; GOARCH=amd64; race=false; cgo=true
Configuring a new instance
First configuration step is to set up the database that GoatCounter will use to store your website statistic. It has support for PostgresSQL and SQLite3. We’ll use the lastsince there is no additional work for installing or configuring it. The command below will ask you to enter a password that will be used to access your blog’s statistics and it will also create the db/goatcounter.sqlite3 file.
$ goatcounter create -domain stats.yourblog.com -email [email protected] -createdb
Now let’s do the first test. The command below will run GoatCounter at the 5000 port of your virtual machine:
$ goatcounter serve -db sqlite3://db/goatcounter.sqlite3 -listen :5000 -tls none

┏━━━━━━━━━━━━━━━━━━━━━ Thank you for using GoatCounter! ━━━━━━━━━━━━━━━━━━━━━━┓
┃                                                                             ┃
┃ Great you're choosing to self-host GoatCounter! I'd just like to put a      ┃
┃ reminder here that I work on this full-time; it's not a side-project.       ┃
┃ Please consider making a financial contribution according to your means if  ┃
┃ this is useful for you to ensure the long-term viability. Thank you :-)     ┃
┃                                                                             ┃
┃                   https://www.goatcounter.com/contribute                    ┃
┗━━━━━━━━━━━━━━━━━━━━━━━━━━━━━━━━━━━━━━━━━━━━━━━━━━━━━━━━━━━━━━━━━━━━━━━━━━━━━┛

   Oct  3 00:04:43 INFO: ready; serving 1 sites on ":5000"; dev=false; sites: stats.yourblog.com
Open your browser and go to http://stats.yourblog.com:5000. If everything has worked out so far, you should see the following error on the screen:
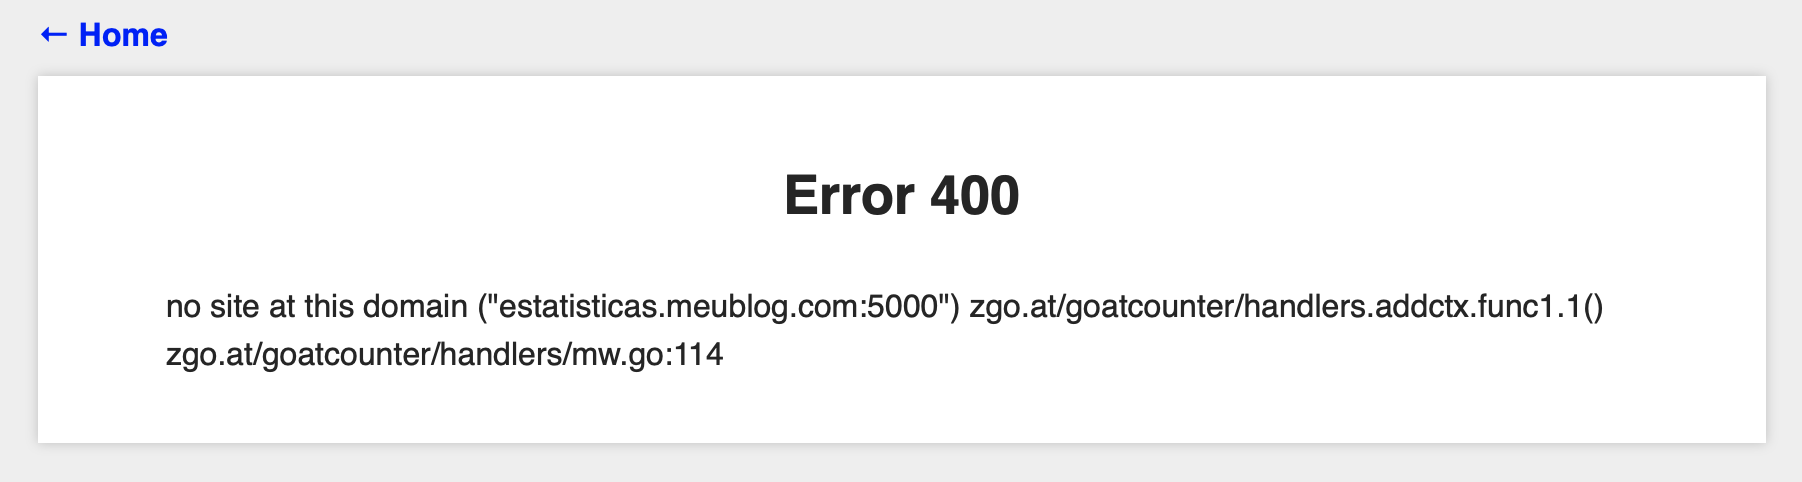
Ignore the domain “estatisticas.meublog.com”. This image is from the original article written in Portuguese.
Running GoatCounter manually, as we did above, was enough to get to the Error 400 page. This error is expected because GoatCounter was configured to be accessed at http://stats.yourblog.com and not http://stats.yourblog.com:5000.
We now need to run GoatCounter in a more stable way. Imagine if the virtual machine restarts during a maintenance window, it’s ideal that GoatCounter goes back online as soon as the machine is available. To automate this process, we’ll use a service already available on most Linux distributions, Systemd.
Systemd is a Linux component that provides control over which programs runs after the operating system starts. This definition can be simplistic, but it’s exactly the feature we’re interested in.
To make systemd responsible for running a particular program, simply create a new file in the /etc/systemd/system/ folder and write down the instructions on how to execute the program. In our case let’s create the goatcounter.service file:
$ sudo vim /etc/systemd/system/goatcounter.service
The content of the file should be:
# /etc/systemd/system/goatcounter.service
# Description of what the program does
[Unit]
Description=GoatCounter

[Service]
Type=simple
# If anything unexpected happens, Systemd will try to restart the program
Restart=always
# We need to send the absolute path of the database to GoatCounter.
ExecStart=/usr/bin/env goatcounter serve -db sqlite3:///home/<your-username>/db/goatcounter.sqlite3 -listen :5000 -tls none

[Install]
WantedBy=multi-user.target
Instead of the way we did before, in order to run GoatCounter use the following command:
$ systemctl start goatcounter
Tip: In the future, to verify if GoatCounter is active and running, use the option status of systemclt command:
$ systemctl status goatcounter
Last step before gathering statistics of your site, is to configure HTTPS access to GoatCounter. To do that, we’ll use another program called Caddy Server.
Update: Nov 10, 2020
After publishing this article, I sent it to the official Telegram group, in which the creator of GoatCounter is present. Surprisingly enough, he read and reviewed the article and let me know that GoatCounter is already integrated with Let’s Encrypt, in other words, it already has HTTPS support. This feature makes the section about Caddy Server not required. However, since the content is still valid for use cases where there isn’t automatically support for HTTPS, I’ll keep it in the article.
If you want to use only GoatCounter, which is the simpler option, there are two steps required:
1 - You need to give GoatCounter permission to listen the 443 port, used for HTTPS. To do that, run the following command:
sudo setcap 'cap_net_bind_service=+ep' /usr/local/bin/goatcounter
2 - Now, open the file /etc/systemd/system/goatcounter.service and remove the part -listen :5000 -tls none.
Done, now you can just restart GoatCounter with systemctl restart goatcounter and go to the section Update your blog.
Caddy Server
Caddy Service is an effortless to configure web server. We’ll use it mainly because it automatically provides HTTPS support.
Installing Caddy Server
The instructions below are for Ubuntu or Debian. If this is not your case, look in the documentation for the installation steps for your Linux distribution.
# Add Caddy respository to the APT package manager
$ echo "deb [trusted=yes] https://apt.fury.io/caddy/ /" \
    | sudo tee -a /etc/apt/sources.list.d/caddy-fury.list

# Update list of available packages
$ sudo apt update

# Install Caddy
$ sudo apt install caddy
Configuration
Caddy’s role is simply to redirect requests that arrive at https://stats.yourblog.com to the GoatCounter running on 5000 port. To configure that behavior, we need only two lines in the /etc/caddy/Caddyfile (if the file has any content, comment with # or delete all lines):
# /etc/caddy/Caddyfile
stats.yourblog.com
reverse_proxy localhost:5000
As we did with GoatCounter, Caddy needs to be restarted so settings take effect:
$ systemctl restart caddy
Now go to the browser again and access https://stats.yourblog.com. The email and password were defined at Configuring a new instance.
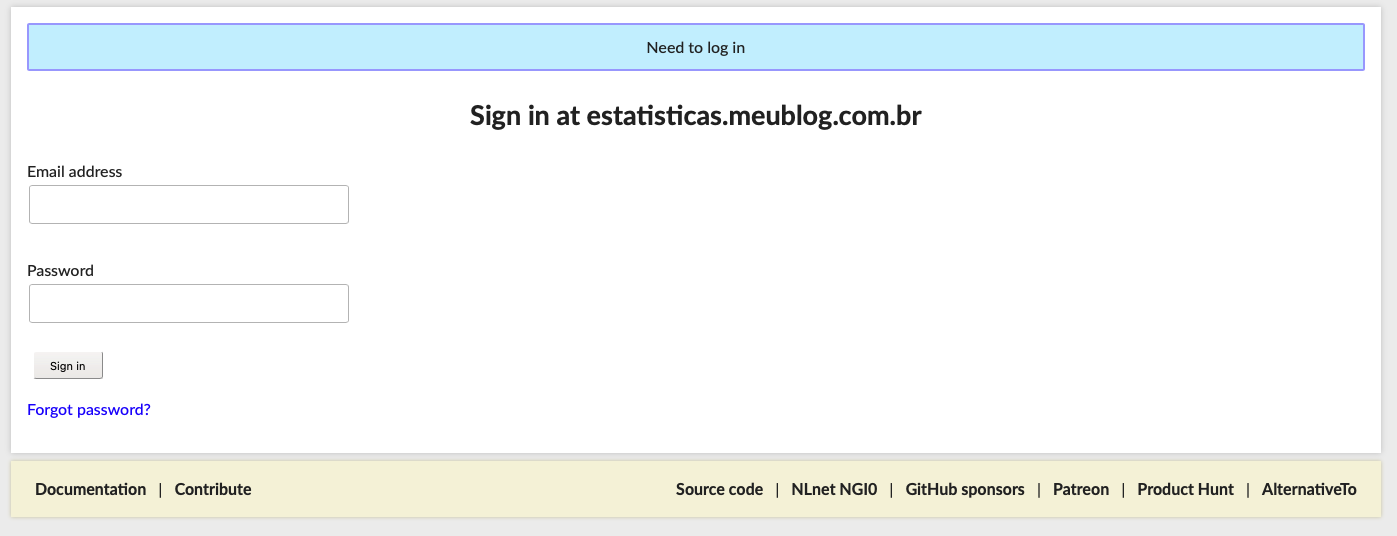
Ignore the domain “estatisticas.meublog.com”. This image is from the original article written in Portuguese.
Update your blog
Last step now is to add the <script> tag to your blog. From then on, accesses will be counted by GoatCounter and you will have your blog statistics available.
<script data-goatcounter="https://stats.yourblog.com/count"
        async src="//stats.yourblog.com/count.js"></script>
For the future
An important topic that I didn’t address and is worth a blog post in itself, is how to back up the database that contains the website statistics. Some hosting services provide automated backup options for an additional fee.
The next tutorial comes from the same motivation I wrote this posrt: how to replace Disqus comment service with Commento. Don Williamson wrote an article in which he teaches how to replace Disqus with Github issues. In the article he demonstrates that, not only the time to load the pages increases by 4 seconds, Disqus makes 105 requests for external tracking services.
If you have any question or suggestion about other interesting statistics services for the web, leave a comment below.

o/
Great post on switching from Google Analytics to GoatCounter! I appreciate the detailed steps and the emphasis on privacy. GoatCounter sounds like an excellent, lightweight alternative. Thanks for sharing this useful guide!
Last step before gathering statistics of your site, is to configure HTTPS access to GoatCounter. To do that, we’ll use another program called Caddy Server.
We enjoyed reading this article. Your articles are very helpful. I visit this website every day.
An important topic that I didn’t address and is worth a blog post in itself, is how to back up the database that contains the website statistics.